
Showing posts with label craft. Show all posts
Showing posts with label craft. Show all posts
Thursday, February 27, 2014


Wednesday, June 27, 2012
Origami Fortune Teller

http://www.origami-instructions.com/origami-fortune-teller.html
All you need is a piece of paper, pen/pencil/ or markers :)
Wednesday, June 20, 2012
Owls, Foil, Glue, and Shoe Polish

1. Draw your picture on paper the size of your final cardboard. Just the big shapes, no details.
You could use coloring books, but the kid's drawings are so wonderful, I would hate to miss out on them!!
2. Go over your simple drawing with Sharpie.
3. Turn your drawing over. On the back, use your pencil on it's side to go over your lines.
4. Place your drawing right side up on cardboard and trace over your lines for a graphite transfer to the cardboard. (Or, if you want to speed this up, just draw directly on the cardboard. I like to teach the transfer skill, something they can use on future projects.)
5.Go over with Sharpie if needed to see lines clearly. 6. Use a thick, tacky glue to go over the lines and let dry.
7. Use a glue stick to attach the foil. (Shiny or dull side showing-you decide.)
8. Wrap the foil over the front and to the back.
9. Press foil down around dry glue lines. Use a paper towel over your fingers as you rub to avoid tearing the foil.
10. Then use a cotton swab up against the glue outlines once the foil is pressed down, just to be sure the glue outlines show up really well.
11. Draw patterns in all of the spaces with a dull pencil. (Use a variety of types of line and scales of patterns.)
Once you've filled all of the spaces, rub over the whole thing with black shoe polish, wait a few seconds, and wipe off. (I use the kind that comes in a bottle with a sponge applicator lid.)
Yes. Lots of steps. But the results are so wonderful!
Wednesday, June 13, 2012

Tuesday, June 12, 2012
DIY Temporary Tattoos

via:
http://charlotteisnotmyname.tumblr.com/post/11523186764/temporary-tattoos-tutorialTemporary Tattoos Tutorial
Hey everybody!If you ever thought about doing a tattoo, but you don’t really want it to be something permanent, this is the perfect tutorial for you!
I’m going to show you how to do temporary tattoos. They’re fun, quick and easy to do!
So first of, what do you need?
Pencil (3B/4B/5B/6B), scissor, tracing paper; wet cloth, talcum powder, eyeliner, makeup brush, ethyl alcohol, cotton pads and liquid bandage spray (waterproof).
First you’ll need a drawing or word/phrase. Draw it on the tracing paper (making sure it’s the size you want) and cut it.
Scrub your skin with ethyl alcohol where you’ll be doing your tattoo and put the tracing paper over it (with the drawing facing down).
With the wet cloth, pressure the drawing against the skin. Remove the tracing paper and you should have an outline of the drawing on your skin.
Draw the tattoo with eyeliner. Wait a few seconds, then put a bit a talcum powder over the drawing and spread it around with the brush.
Again, wait a few seconds and then spray the drawing with the liquid bandage spray. Make sure it covers the entire area of the tattoo and let it dry. It will be is waterproof.
Done! Try not to rub it and it should last 3/4 days.
Have fun!
Monday, June 11, 2012

Thursday, June 7, 2012

Wednesday, June 6, 2012

Wednesday, May 30, 2012
Kitchen Craft: Soap Clouds
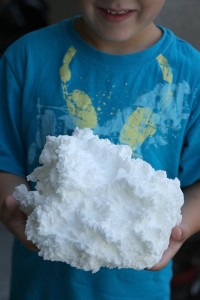
http://www.ourbestbites.com/2012/04/kitchen-craft-soap-clouds-and-homemade-kiddie-tub-soaps/
Create moldable soap clouds by microwaving a bar of ivory soap!
Homemade Sprinkler

Friday, May 25, 2012
Butterfly Mobile

Easy Spring/Summer Craft...link includes butterfly template.
http://twigandtoadstool.blogspot.com/2010/04/butterfly-mobile.html
Thursday, May 17, 2012
Handprint Rainbow

http://www.enchantedlearning.com/crafts/stpatrick/handprintrainbow/
Wednesday, May 2, 2012
Snow Paint

Tuesday, May 1, 2012

Monday, April 30, 2012
Oriental Trading Magazine/Online- Low Cost Crafts

click here to go to www.orientaltrading.com
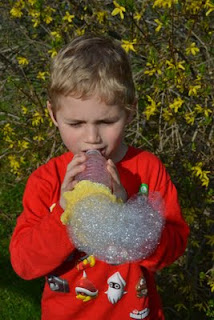
Make a Bubble Snake- A boy friendly craft
Make Your Own Lava Lamp- a boy friendly craft

All you need is ~ cooking oil, water, food coloring, an empty water bottle, and Alka Seltzer antacid tablets.
click here for instructions
Subscribe to:
Posts (Atom)